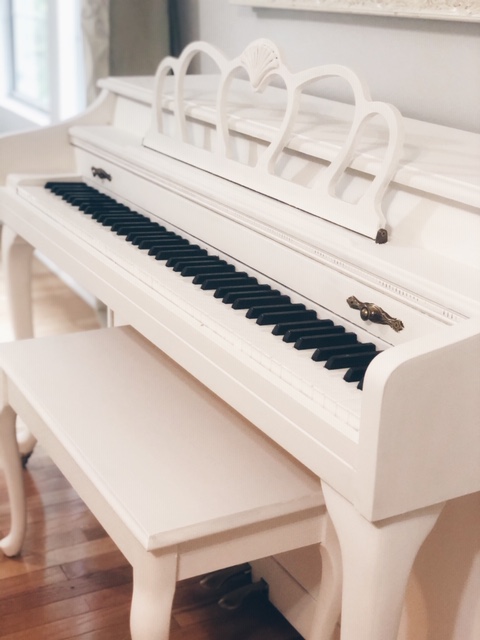
We are in the process of building our farmhouse (see?! ) and when I realized our piano would fit perfectly in our foyer, I knew it was time to paint it. My goal had always been to have a painted piano, but when I originally sought out a piano on Facebook Marketplace a couple years ago, an old college chum told me about her family’s one and it was too good of a deal to pass up. It was so beautiful, in fact, that I felt too guilty to paint the past two years.
But with this farmhouse coming, and all the French country farmhouse vibe dreams playing in my head, I knew it was time. And in the process, I learned some dos and dont’s the hard way that I’ll be happy to share too!
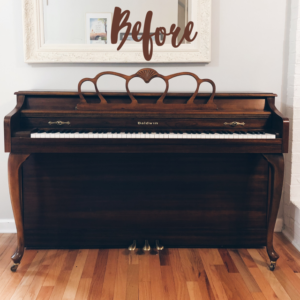
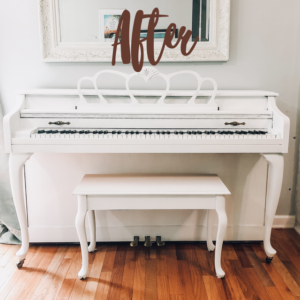
So first, here are some handy facts about my process:
- How long did it take? About 5 hours spread out over a week.
- Can it be done in a day? Yes! But I have kids, who are such good “helpers”, so…
- Supplies:
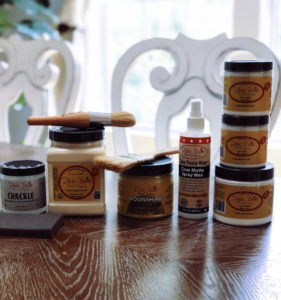
While I bought all of these supplies, I only ended up needing:
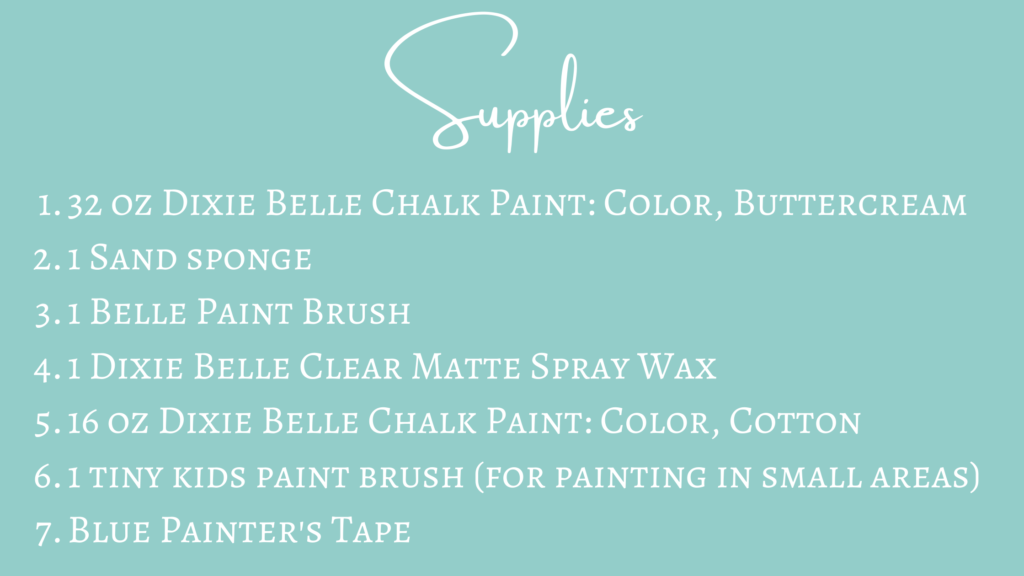
So, here are the STEPS:
STEP 1: Gather your supplies.
STEP 2: Move the piano to a place where it’s sitting over a drop cloth (or, I did the lazy way and rolled my rug up in order to place it on my rug pad–totally recommend).
STEP 3: Clean your piano.
STEP 4: Sand your piano (It only took a few minutes to rub my piano down with the sanding sponge).
STEP 5: Remove any removable hardware and put painter’s tape over keys and anything non-removable (Tip: I decided to just put painter’s tape over my brass hardware instead of taking time to remove it and definitely would not recommend doing that. If you can remove any hardware, do it, otherwise you may end up with a few spots where the wood doesn’t get painted and you have to cut in with a fine brush and it still won’t look quite as polished).
STEP 6: Shake your paint vigorously, spritz with a little bit of water to get your piano damp, and then paint your first coat. (Tip: They didn’t have enough pure white Cotton so I bought the Buttercream and used that for the first two coats. It took two coats to get the dark paint covered up. Thankfully, it is pretty easy and quick to paint the piano, though! By the time you finish on one side, the chalk paint will have dried and you can start doing a second/third/fourth layer right then! Chalk paint is great for drying quickly).
STEP 7: Repeat with a 2nd coat/3rd coat/4th coat.
STEP 8: Remove painter’s tape and take a fine brush to paint above the keys (I took one my kid’s paintbrushes). Do several coats wherever it needs a touch-up.
STEP 9: Spray with matte wax all over and wipe with a clean cloth to spread it evenly over piano. Repeat as many times as desired (I did 3).
And there you have it! Nine easy steps to a painted piano!
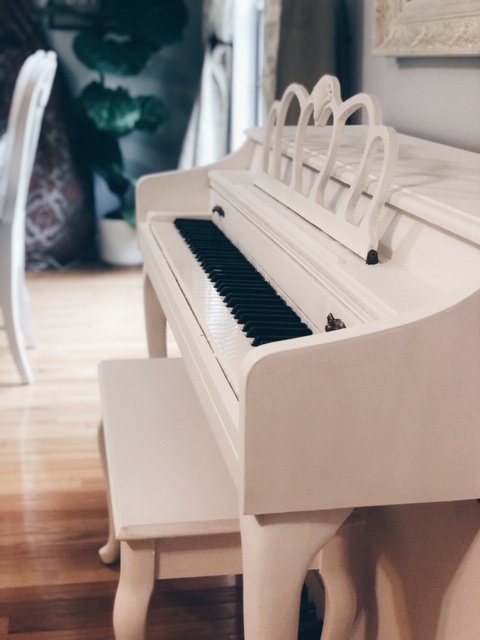
See my process in action over on my TikTok account (@melissafergusonlife) or Instagram (@thefriendlyfarmhouse) and be sure to sign up for my newsletter below for monthly farmhouse inspiration along with author-life news!




Your piano came out beautiful!!!
Thank you!! I would love to find a little cushion for it next! If you have any tips, please let me know 🙂
That is truly beautiful, but I would never attempt it.
Thank you! If you ever decide to, it’s truly worth it!
Wow! I love how it makes the black keys stand out and Makes a heavy piece of furniture look so elegant!
Thank you!!!!! I love it! Now just to find a cute piano cushion! (etsy?)
Make a cushjon or find a friend wHo sews, thaT way you can pick from aLl the BEAUTIFUL FABRICS. Better than picking a cushion. .
I too love the difference from darf to light fot the piano, it will draw mote people to it.
Oh yes and I think Etsy may have some really lovely finds!